Document Management
Objective: Gain an understanding of how to manage documents in various parts of the system.
Brightly Assetic includes a Documents module that allows the management and searching of documents across the entire system. This allows a user to add pertinent documents that they wish to store in the Assetic library. It is possible to store a wide variety of documents with large file sizes (up to 1GB).
Documents can be stored contextually against any of the following entities in the platform:
-
Assets
-
Work Orders
-
Work Requests
Documents can be things like:
-
Asset / Defect Photos
-
Floor plans / CAD drawings
-
Lease Agreements
-
Health and Safety checklists
-
Product Manuals, etc
NOTE Additionally the software has a System Connector module that an Administrator can configure to work contextually with a range of third-party Document Management systems.
For security reasons, certain executable file types are not permitted to be uploaded as Documents in the system. The following link outlines which file types are rejected for uploading.
Managing Documents against Contextual Records
In various parts of the system, including the Asset Register, Work Requests, Work Orders, Assessments, etc, there is a "Documents" tab available for the record being viewed.
The Documents tab will provide a listing similar to the following:
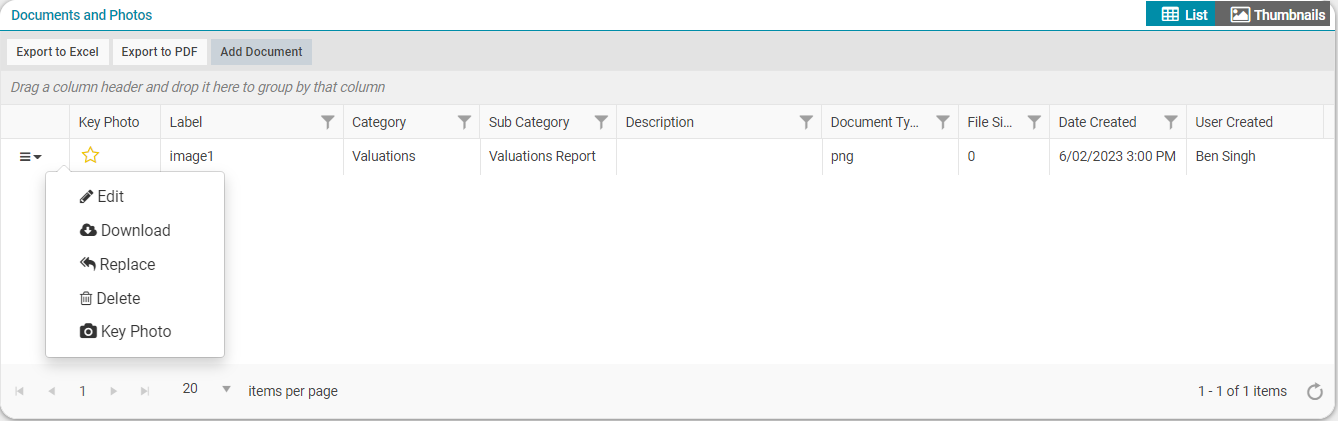
In the above example, the menu icon for each existing document can be clicked on and will provide a series of available actions:
-
Edit: allows the editing of the label, classification and expiry date of the document.
-
Download: will download a copy of the document to a local computer.
-
Replace: allows for the current document to be replaced with a newer version.
-
Delete: deletes the document from the record.
-
Key Photo: for certain records (e.g. the asset register), a photo can be assigned for use as a key photo when viewing or searching for the record.
There are also fields available to assist and enable sorting/filtering to quickly locate Documents when there is a large number of Documents stored against the record. These column fields include:
-
Classification fields (Group, Document Category & Subcategory)
-
Document Type/Size
-
Expiry Date (to capture warranty expiry etc)
-
Data Created and who created the document
Clicking the "Add Document" button will open a dialog box, where the new file is uploaded and information about the file is added:

-
Group: mandatory field to reflect a basic classification for the document.
-
Document Category: optional field to reflect system module information.
-
Document Subcategory: optional field to reflect system module information.
-
Expiry Date: optional field to make the document become inactive once the Expiry Date is exceeded.
-
Is Link: is a tick box to provide a link to the new document, rather than uploading a file. Once this box is ticked, 'Upload Document' field becomes inactive, and the following fields need to be completed:

-
Document Label: a free text field to enter the label for the document.
-
Document Link: paste the hyperlink to the document.
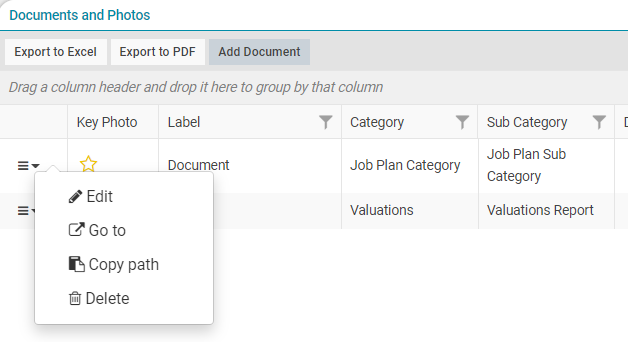
NOTE When a link is provided in the Document Link field, it can be accessed by clicking on 'Go To', available in the menu icon for this document:
-
Upload Document: This field is only available when the users do not select to attach a link to the Documents. If this is available, it is mandatory to click the "Select files" button to upload a document.
-
External ID: External identifier is a free text field that allows clients to add the identifiers that are contained in a separate system.
-
Description: Description is a free text field that allows users to add any pertinent descriptive information about the document to the upload.
Click "Save" to save the document against the record.
Aggregate Search and Management of Documents
It is also possible to search and view data for all Documents in the entire system.
In Quick Search, the "doc: keyword" syntax can be used to search only for the documents matching the keyword search.
In Advanced Search the entire Documents module can be used to produce a report on all documents stored in the system. This can be sorted and filtered, and widgets can be created against this data as per other Advanced Search Profiles.
Creating new Document Categories and Subcategories
Additional Document Categories and Subcategories can be created by Administrators, for use when adding documents to the system. To do this, select ‘Admin’ from the Navigation Sidebar, and ‘Documents’ from the Navigation Dropdown.
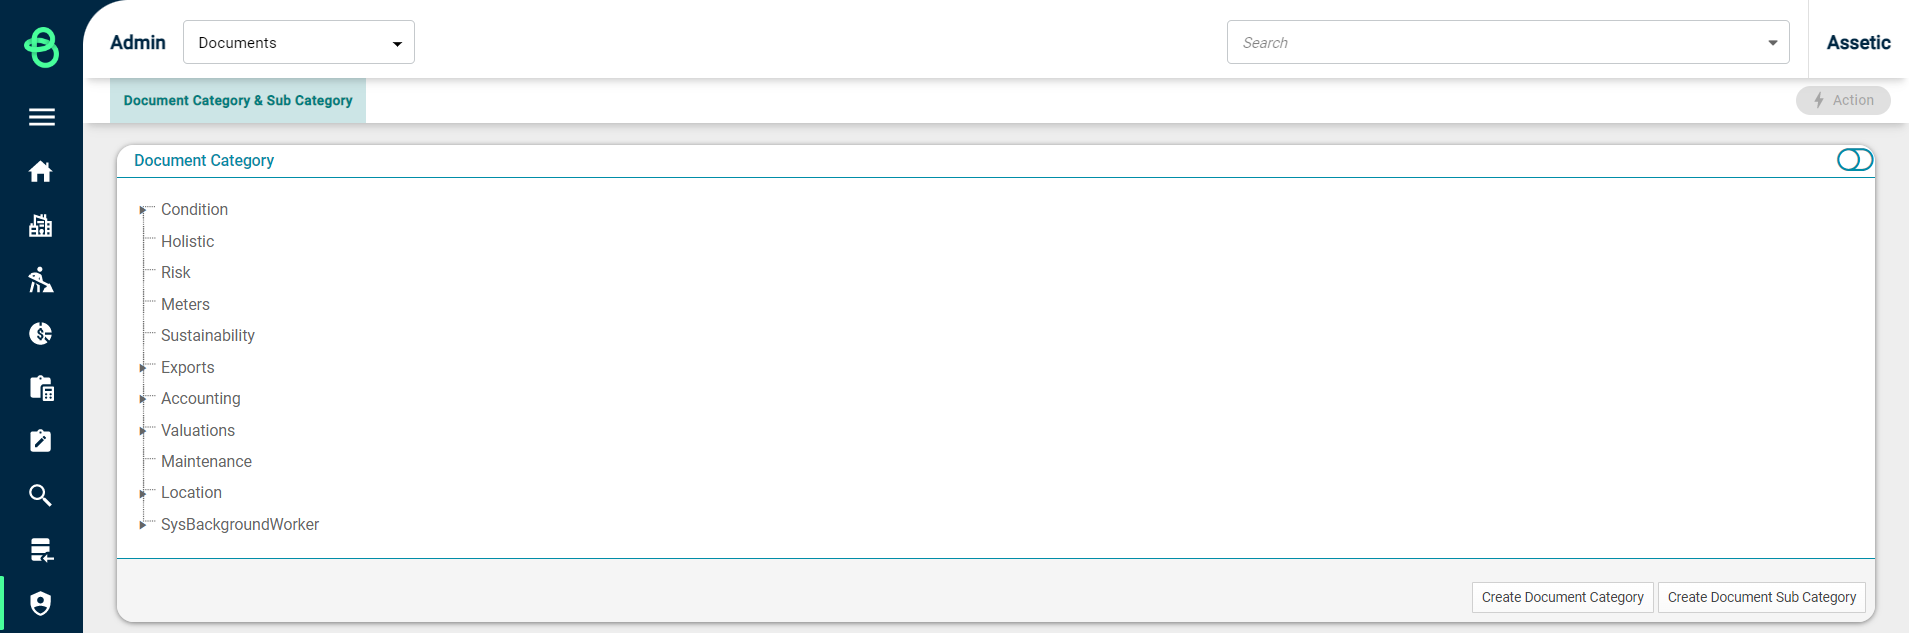
Next, click the ‘Create Document Category’ button:

Populate the label for the new Document Category, then click 'Save.' Next, click the 'Create Document Subcategory’ button:
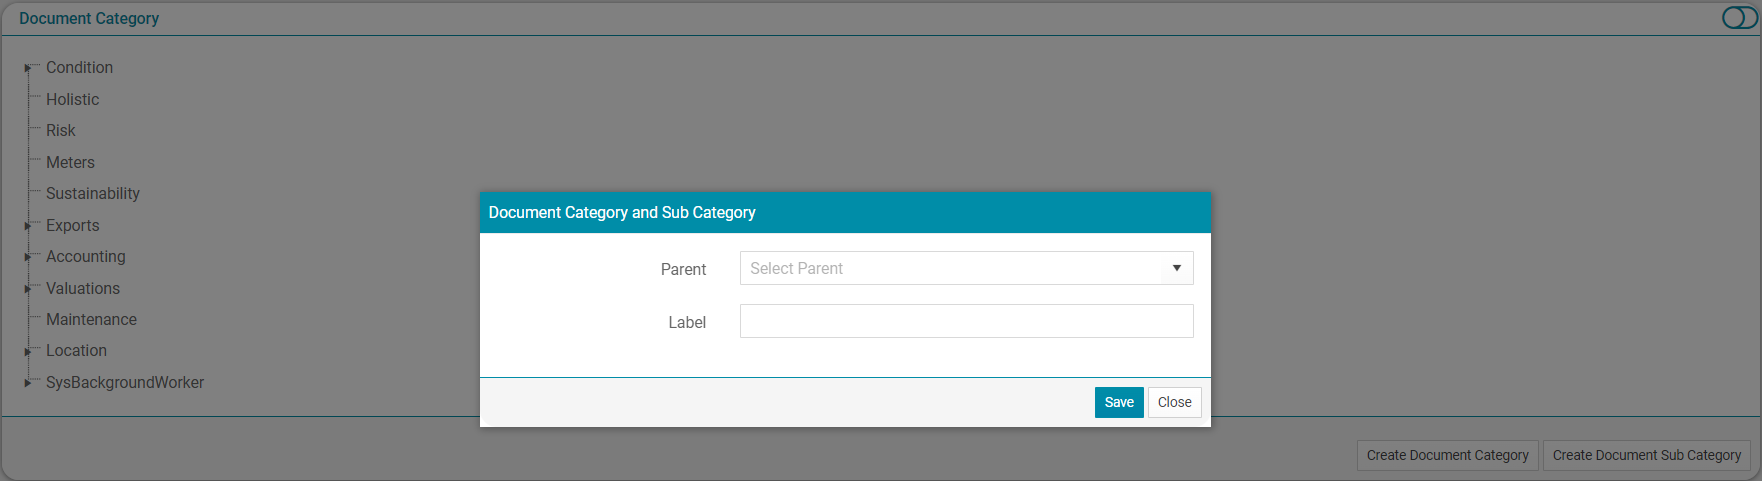
Select the parent Document Category from the drop-down, then populate the label for the New Document Subcategory, and click 'Save' to finish the creation process.
